Wild Tea and Vibrant Tea Defuser

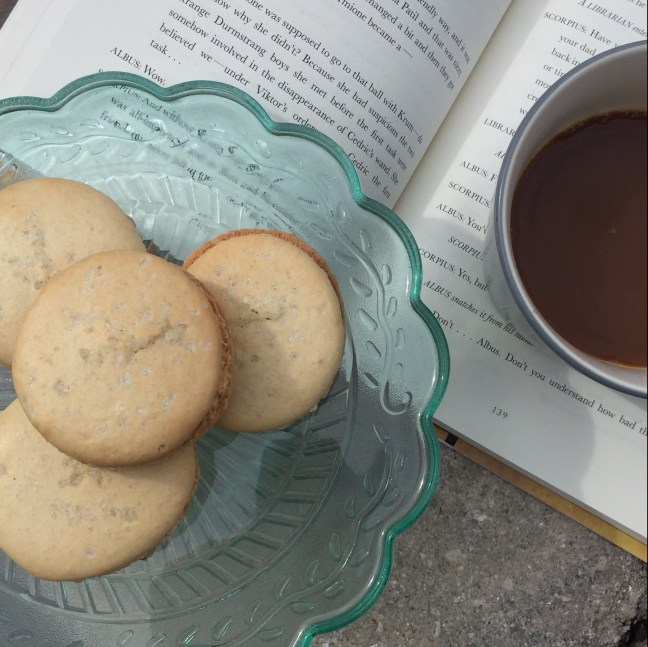
A sweet tasting tea in a ‘HOT’ container.

Amazon has been a useful tool lately and a great way to send gifts across the country.  I had never heard of The Wild Crew before.  It wasn’t until recently that I was gifted this tea along with this cool drink container.

DSC_1230 (1)

DSC_1232 (1)

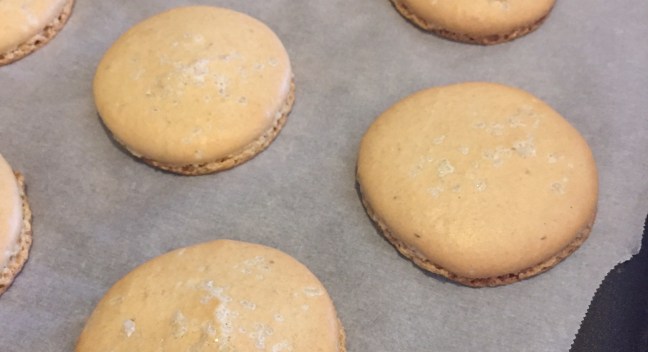
The tea is sweet and has a red vibrant color.  There was no need for honey, sugar or cream.  It tasted so great all on its own. You only need a small portion to make such a great flavored tea.  The Wild Crew has a decent selection of teas – all are loose leaf.

Here is where this ‘mug’ comes in handy.  It has a defuser that can be removed if you want to have a different drink (coffee, water, etc).  But if you prefer a good tea… you add a small portion of loose leaf tea, close the lid to the defuser and insert it into the ‘mug’.

I proceeded to heated up some water and poured it over the defuser. I let it slowly steep the tea.  It only took moments to begin smelling the delicious aroma. I made sure to close the ‘mug’ shake and let sit for about 10 minutes.  This container will stay hot for hours so be careful when taking your first sips.

DSC_1259

The main reason I have come to enjoy this tea is the fact that I am doing my best to learn how to make my own tea.  When you open the Wild Tea, you see so many different dried fruits, herbs and tea leaves that it makes me think I can make my very own.  I have been learning about loose leaf teas, dehydrators, and much more.  I would love to be able to make another area for jobs to become available when I open my tearoom.  How neat would it be to see  hard working people (mainly those with disabilities) take on a job making delicious loose leaf tea and have the opportunity to see people enjoy it?  I know I would be a proud owner.

If you have any suggestions for delicious loose leaf tea that might be easy to put into steps please feel free to share.

Thanks,

Katie

I do not receive compensation for this post. However I do receive compensation if you link on either item through amazon:

Organic Berry Loose Leaf Tea, Wild Tea 6, Herbal Tea With Hibiscus, Elderberry, Currant and Cranberry (4 ounce)“>Wild Tea #6 or VIBRANT ALL IN ONE Travel Mug – TEA INFUSER Bottle WITH 2 PIECE STEEPER STRAINER COMBO – Insulated HOT COFFEE THERMOS – Cold FRUIT INFUSED Water – LEAK PROOF Tumbler Double wall Stainless Steel 17oz“>Vibrant All in One Mug 

If you are interested in other products as well as The Wild Crew tea visit: http://www.wildfoods.co

and follow them on instagram: @WildFoodsCo

Foundation Coffee Co.

Looking for a delicious and artful cappuccino? Foundation Coffee Co. ranks up there for quality coffee and artistic touches.  And I don’t just mean in their coffee drinks.  Both locations have unique settings that captivate the eye and encourage relaxation with a bit of industrial creativity.

dsc_1103


As you now may know, Foundation Coffee Co. has two locations in the Hillsborough County area.  Foundations first location started in Riverview on Boyette Rd. It has a beautiful outdoor setting with an appealing amount of seating.  They have a high class trailer where they brew their specialty coffee. Not interested in Coffee?  Well they even have a few smoothies and baked goods from small businesses around the Tampa area. Just want to enjoy the scenery?  Find a comfy seat and enjoy the weather.  There is complimentary water to sip on while you take in your surroundings.  Dogs are welcome to enjoy the setting too.

dsc_1086
Riverview location has a drive-thru

The Tampa location is a beautiful brick building that makes you feel as if you’ve traveled back in time.  As you walk in you are taken back by the craftsmanship of each item chosen and built for this particular setting.  Comfortable seating, a water feature to gaze at and listen to, an amazing coffee drip system lifted up against a wall, historic photos and an amazing back patio that also has a creative water feature.  Consider yourself lucky as you sit and sip your coffee here.

If and when you have time to visit make sure to check out the artwork on the walls.  An art agency called FRINGE Creatives helps artists sell their work in different social hang outs around Tampa.  If you find yourself interested in one, they are for sale.  It’s just another great way that Foundation Coffee Co. supports their small business friends.

dsc_1096

Both locations are a great place to enjoy friends and relationships. Each location focuses on their community and works to serve their customers appropriately.  They recognize that they are a small business and enjoy helping other small businesses.  And though they may be small they have big dreams.  They recently began renting out their coffee shop in downtown Tampa for small events (you can rent it too by going to their website).  They support the monthly Indie Flea Market. And they have even created a portable coffee station for events, like weddings.


Visit their website for more information on this amazing Coffee Co.  http://www.foundationcoffeeco.com/

coffee-owners
Emily and Jason Smith – Owners of Foundation Coffee (photo cred: Foundation Coffee Co.)

I’m learning a lot from these two entrepreneurs.  I’m also excited to let you all know that we have teamed up and I am selling my macarons at the Foundation Coffee Co. in Riverview Fl.  Stop by and try them.  I would love to hear from you and any feedback would be helpful.  Hoping to perfect these delicate cookies and learn more about owning my own business.  Thanks Foundation Coffee Co. for your support and encouragement!

Katie

Tea Cup Hanging Rack Re-purposed

Occasionally things break, don’t let that be the end all and trash the item.  Use your creative ideas and figure a way to reuse the broken item.  For example, I was using this mirror as a chalk board for messages for parties and art festivals.  Unfortunately it was dropped; the mirror shattered to pieces and the wood chipped on the edges.  I thought about just tossing it and moving on, but then an idea came to me.

img_9560

Last mothers day my husband installed a bar rack in our room and hung bathroom curtain hooks from it.  I was able to hang my long necklaces from it and it was amazingly convent and appeasing to the eyes (yes that’s one of my adorable daughters posing for the camera).

fullsizerender-5

His crafty work got my mind thinking, I could use the top part of the mirror board and turn it into a hanging rack for tea cups!  It took a while and a lot of searching on Pinterest to finally get the right plan/idea in mind, so without further delay I give you my tea cup hanging rack (pear and plum colors):

Hope the following steps help you to try your hand at re-purposing broken items.  Use those creative juices and feel free to use any tips and tricks stated below.

1. My husband did a great job cutting this piece to a great size.

2. I sanded down the rough edges.

3. I then painted the piece using primer. Make sure to do at least two coats.

img_9220

4. Make sure to lay your piece flat so that the paint doesn’t run.

5. Now for the first of many colored layers, I started with a lite green.  Spray paint goes on smoother and doesn’t leave you with lines like a paint brush with leave. I did two spray painted coats.

img_9247

6. I then porceded to tape off the sections that would be painted another color.

7. I highly recommend using a clear paint sealer once you’ve taped all areas needed.  This way the paint won’t bleed under the tape and spread (as you’ll notice in some example pics below – step 9).


8. I used white primer paint first, then a plum purple I wanted see at the end of the project. Remember to check your garage/house for any leftover paint before purchasing new paint.  It will save you a good bit of money.

img_9253

9. Peel the tape off before the paint completely drys. And notice what happens if you don’t do the clear sealer before painting – pic on right.

10. Now it’s time for another layer – an extremely lite green color (closer to the pear color I like).  Yes I sprayed over my hard work, and a little around the craftsmanship in the middle.  This makes for a great layered effect later on – you’ll see.

img_9502

11. I spray painted the hanging rod white first and then the lite pear green color.  I sprayed it the same color as the main piece. I wanted it to blend in.

img_9631

12. Using a foam brush and a darker pear green color, I painted particular areas that helps my piece stand out.

13. I carefully taped off lined areas and painted. First the clear sealer, then white primer, and last but not least the gorgeous plum purple color again. Once again I used a sponge brush.


14. It’s time to sand!  Have fun with it.  It doesn’t have to be perfect.  As you can see, there is a great layering effect with the paint colors coming through – even got a little wood showing 🙂

img_9654

15. I made sure to seal my paint work with a spray on sealer. This includes the rod.

img_9655

16. While the sealer dried, I painted some shower curtain hooks plum purple to match the tea cup rack piece.  I found these particular hooks at target. I love that they are flowers.

17. My loving husband helped screw in the rod as well as measure out and put in place the hanging wire.

18. Once it was completed, I quickly hung it and began hanging my collection of tea cups.

Thanks for reading!  I look forward to hearing how you re-purposed a broken piece and gave it new life.

Katie

Caramel Salted Macarons

Caramel Salted Macarons

These macarons are a great treat with a good cup of coffee.  Grab your favorite book, snack and sip and you’ll be smiling all day.  I tried quite a few different caramel salted macaron recipes.  From homemade caramel to this ingenious idea to boil a can of sweetened condensed milk.  I’d have to say this is one of the easier macaron recipes I’ve tried and highly recommend it for your first attempt at macarons.  Make sure it matches your taste buds though; not everyone likes the sweet and salty caramel treat.  I made mine a bit sweeter by adding light brown sugar into the egg whites instead of regular granulated sugar. Bake, share and enjoy!

img_9664

Macaron Filling – Dulce de Leche

Ingredients:

1 can of sweetened condensed milk

Instructions:

  1. Bring a large pot of water to a rolling boil.  Make sure that you put enough water in the pot to completely cover the can.
  2. Remove the label from the can of sweetened condensed milk and carefully submerge it into the boiling water using a pair of tongs.  Make sure you place the can on its side, so it can roll around.
  3. Boil the can for 3 hours, making sure the can is covered with water at all times.  Add more boiled water if needed.
  4. Using a pair of tongs, take the can out of the pot and place it onto a heatproof surface to cool.  Make sure it has cooled to at least room temperature before opening the can, otherwise the dulce de leche will squirt out like a fountain.
  5. Once cooled, place dulce de leche in the refrigerator for an hour and a half (cooled dulce de leche can be stored, tightly covered in the refrigerator for up to 3 weeks) .
  6. When finished cooling, open the can, stir and scoop the cooled filling into a piping bag.  Pipe a small amount onto the macaron shells. Don’t overfill.
  7. Gently place matched shells together.


Macaron Batter

Ingredients:

¾ cup almond flour

1 cup of powdered/confectioners sugar

1 tsp of cream of tartar

2 egg whites

¼ cup light brown sugar

1 tsp coarse sea salt

img_9636

Instructions:

  1. Line parchment paper on two baking sheets.
  2. Have a piping bag prepared with a ½ inch tip and place it in upright in a glass cup.
  3. In a medium bowl, sift almond flour, powdered sugar and cream of tartar. Set aside until step 6
  4. In another medium bowl, beat egg whites at high speed using a wire whisk attachment
  5. When it begins to foam, add in brown sugar and continue to mix until peaks form (2 drops yellow food coloring – optional)
  6. Using a spatula, fold dry ingredients into egg whites.  Do this in TWO batches.
  7. Scoop batter into prepared piping bag.
  8. Pipe batter onto the parchment paper about 1 inch in diameter. Remember to tap the trays so air bubbles surface and macaron shells flatten.
  9. Preheat oven to 300
  10. Sprinkle a pinch of coarse sea salt on top of each macaron. Let the macarons sit for 20 to 30 mins until a “skin” forms.
  11. Bake one pan at a time for 12 to 15 mins. Depending on your oven
  12. Remove the pan from the oven and let the macaron shells cool completely.
  13. Once cooled, begin flipping and matching liked sized macaron shells.  This way they are ready for the filling.

Nila’s blog was extremely helpful!  Make sure to visit her blog for great recipes with good details. the tough cookie


White Tea Blueberry & Elderflower

I received a surprise package a few months ago and inside I was given this delicious tea. Now, I get no compensation for this review, just the joy of sharing something tasty with others.

This has been my go to tea lately.  It goes well with my recent scone recipe (hint, hint).  It is made with delicious blueberries, sweet Elderflowers, lemongrass and naturally sweet white tea.  What makes this tea even better is that it is organic.  English Tea Shop recommends letting the tea bag sit in hot water (176 degrees F) for 2 to 3 minutes to allow the tea to infuse.  I added a sugar cube or two to give it a bit more sweetness.  I’ve also added cream/milk but it is not necessary for this particular tea.

DSC_1352.JPG

I’ve been doing a lot of research on how tea is made and I am looking forward to trying a few recipes myself.  I was blessed with a dehydrator that will be getting plenty of use drying fruit, flowers, herbs and leaves.  My goal is to create a new and unique job for people with disabilities related to making tea.  I’m very excited about the new things I’m learning related to tea and sharing them with my readers.

If you’d like to purchase this tea you may click the link provided English Tea Shop Organic White Tea Blueberry & Elderflower Super Teas (I will be compensated for your purchase through amazon).  I have seen this particular tea at Walmart and Target on rare occasions.

I look forward to hearing about your taste tests, as well as any feedback to making your own tea (steps, helpful hints, etc).


Thanks,

Katie