Peach Semifreddo

I’m a pretty big fan of Giada on Food Network.  She makes this incredible Pineapple Semifreddo that literally melts in your mouth.  Every time I make it for friends and family it is devoured quickly.  So, why not modify the recipe a smidgen, and make it with peaches instead?  My thoughts exactly. By the way this is a huge dessert success for the kiddos too and pretty simple to make.


Ingredients:

  • 1 cup heavy cream
  • 2 tablespoons powdered sugar
  • 1/2 teaspoon vanilla extract
  • 3 egg whites
  • 1/2 cup simple syrup, recipe follows
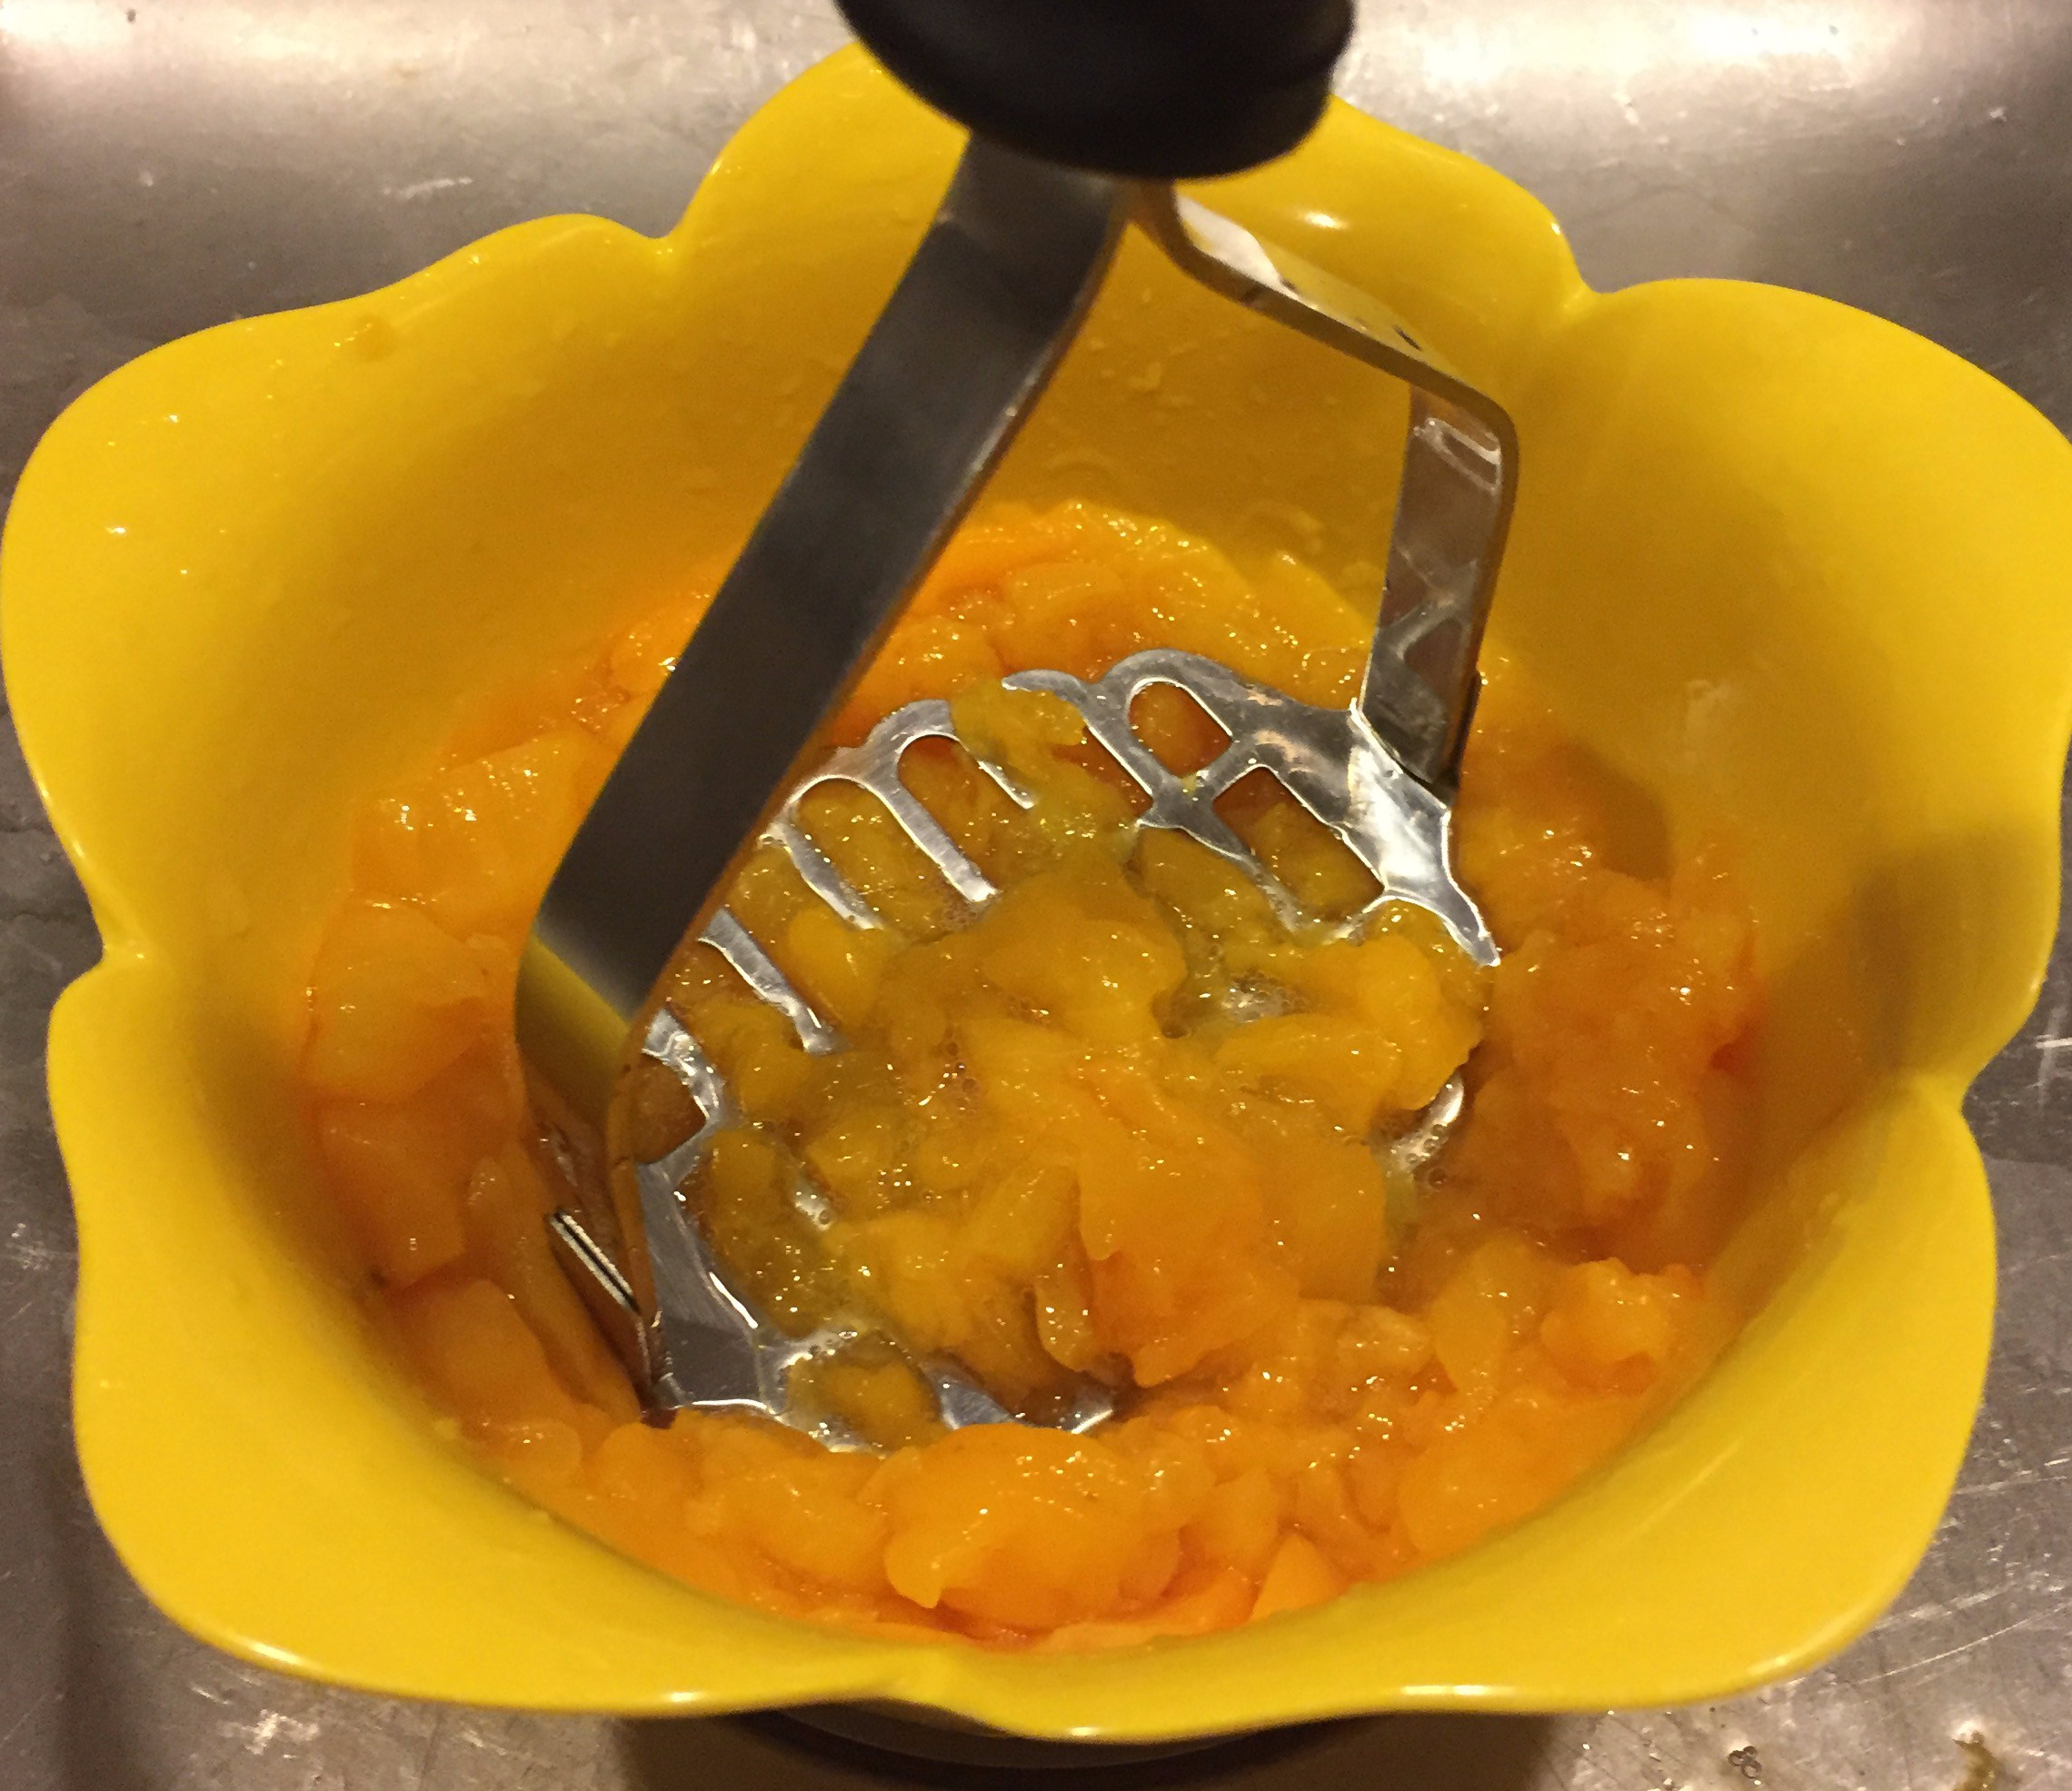
  • 1 (15-ounce) can diced peaches, drained, and mashed
  • 1 cup crushed gingersnap cookies, for sprinkling


Simple Syrup:

  • 1/4 cup water
  • 1/2 cup sugar


1. Spray a 9 1/4 by 5 1/4 by 3-inch (6-cup) metal bread ban lightly with nonstick spray. Line the pan with plastic wrap with enough plastic wrap extending over the sides to cover the top after the pan has been filled.

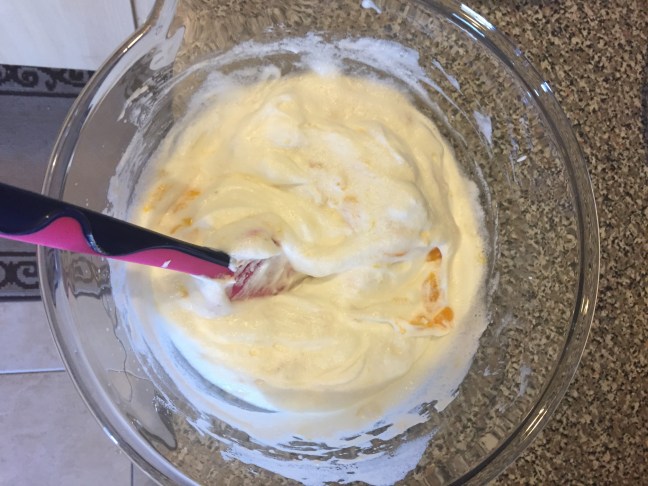
2. In a medium bowl, whip the heavy cream, powdered sugar, and vanilla extract until stiff peaks form. Set aside until step 5.

3. In another medium bowl, whip egg whites until foamy. With the mixer still on, slowly add the simple syrup. Continue beating on high speed until the mixture is glossy and doubles in volume, about 3 to 5 minutes.

img_9760

img_9762

4. Since crushed peaches in a can is not something you find anywhere you need to mash a 15oz can of diced peaches.  Place diced peaches into a strainer and smash the peaches with a masher.

img_9763.jpg


5. Using a rubber spatula, fold the peaches into the egg whites. Then fold the whipped cream into the egg white mixture.

img_9811

6. Gently pour the mixture into the bread pan. Fold over the plastic wrap (cling wrap) to cover and freeze for 8 hours (or up to 1 month).

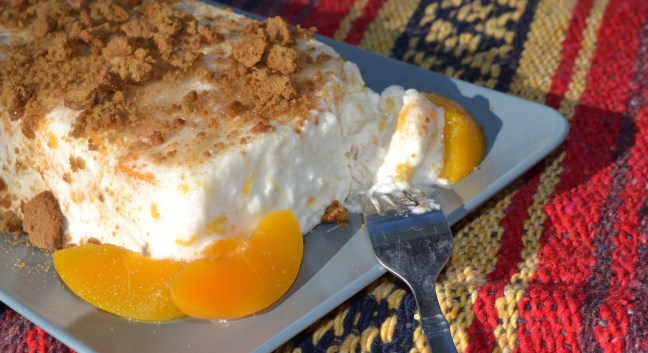
7. To serve; unfold the plastic wrap and invert the semifreddo onto a cutting board. Remove the plastic wrap and cut the semifreddo into one inch thick slices. Place on individual serving plates and top each slice with the crushed ginger cookies.
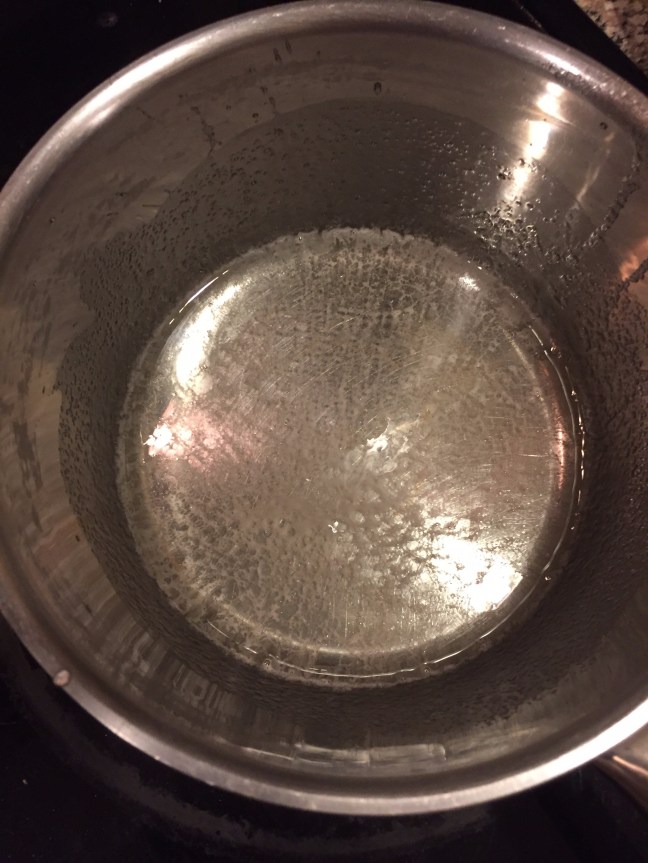
 

Simple Syrup:

In a small pot, combine water and sugar over medium heat. Bring to a boil, reduce heat and let simmer for 5 minutes, until the sugar has dissolved fully. Take the pan off heat and cool the syrup (makes 1/2 cup). Any extra cooled syrup can be saved in an airtight container.

img_9761


And here is the final tasty product:

dsc_1121


Visit: FoodNetwork to get Giada’s Pineapple Semifreddo recipe (the only differences are; instead of crushed pineapple I replaced it with mashed peaches and I used ginger snap cookies instead of amaretti cookies).


Foundation Coffee Co.

Looking for a delicious and artful cappuccino? Foundation Coffee Co. ranks up there for quality coffee and artistic touches.  And I don’t just mean in their coffee drinks.  Both locations have unique settings that captivate the eye and encourage relaxation with a bit of industrial creativity.

dsc_1103


As you now may know, Foundation Coffee Co. has two locations in the Hillsborough County area.  Foundations first location started in Riverview on Boyette Rd. It has a beautiful outdoor setting with an appealing amount of seating.  They have a high class trailer where they brew their specialty coffee. Not interested in Coffee?  Well they even have a few smoothies and baked goods from small businesses around the Tampa area. Just want to enjoy the scenery?  Find a comfy seat and enjoy the weather.  There is complimentary water to sip on while you take in your surroundings.  Dogs are welcome to enjoy the setting too.

dsc_1086
Riverview location has a drive-thru

The Tampa location is a beautiful brick building that makes you feel as if you’ve traveled back in time.  As you walk in you are taken back by the craftsmanship of each item chosen and built for this particular setting.  Comfortable seating, a water feature to gaze at and listen to, an amazing coffee drip system lifted up against a wall, historic photos and an amazing back patio that also has a creative water feature.  Consider yourself lucky as you sit and sip your coffee here.

If and when you have time to visit make sure to check out the artwork on the walls.  An art agency called FRINGE Creatives helps artists sell their work in different social hang outs around Tampa.  If you find yourself interested in one, they are for sale.  It’s just another great way that Foundation Coffee Co. supports their small business friends.

dsc_1096

Both locations are a great place to enjoy friends and relationships. Each location focuses on their community and works to serve their customers appropriately.  They recognize that they are a small business and enjoy helping other small businesses.  And though they may be small they have big dreams.  They recently began renting out their coffee shop in downtown Tampa for small events (you can rent it too by going to their website).  They support the monthly Indie Flea Market. And they have even created a portable coffee station for events, like weddings.


Visit their website for more information on this amazing Coffee Co.  http://www.foundationcoffeeco.com/

coffee-owners
Emily and Jason Smith – Owners of Foundation Coffee (photo cred: Foundation Coffee Co.)

I’m learning a lot from these two entrepreneurs.  I’m also excited to let you all know that we have teamed up and I am selling my macarons at the Foundation Coffee Co. in Riverview Fl.  Stop by and try them.  I would love to hear from you and any feedback would be helpful.  Hoping to perfect these delicate cookies and learn more about owning my own business.  Thanks Foundation Coffee Co. for your support and encouragement!

Katie

Tea Cup Hanging Rack Re-purposed

Occasionally things break, don’t let that be the end all and trash the item.  Use your creative ideas and figure a way to reuse the broken item.  For example, I was using this mirror as a chalk board for messages for parties and art festivals.  Unfortunately it was dropped; the mirror shattered to pieces and the wood chipped on the edges.  I thought about just tossing it and moving on, but then an idea came to me.

img_9560

Last mothers day my husband installed a bar rack in our room and hung bathroom curtain hooks from it.  I was able to hang my long necklaces from it and it was amazingly convent and appeasing to the eyes (yes that’s one of my adorable daughters posing for the camera).

fullsizerender-5

His crafty work got my mind thinking, I could use the top part of the mirror board and turn it into a hanging rack for tea cups!  It took a while and a lot of searching on Pinterest to finally get the right plan/idea in mind, so without further delay I give you my tea cup hanging rack (pear and plum colors):

Hope the following steps help you to try your hand at re-purposing broken items.  Use those creative juices and feel free to use any tips and tricks stated below.

1. My husband did a great job cutting this piece to a great size.

2. I sanded down the rough edges.

3. I then painted the piece using primer. Make sure to do at least two coats.

img_9220

4. Make sure to lay your piece flat so that the paint doesn’t run.

5. Now for the first of many colored layers, I started with a lite green.  Spray paint goes on smoother and doesn’t leave you with lines like a paint brush with leave. I did two spray painted coats.

img_9247

6. I then porceded to tape off the sections that would be painted another color.

7. I highly recommend using a clear paint sealer once you’ve taped all areas needed.  This way the paint won’t bleed under the tape and spread (as you’ll notice in some example pics below – step 9).


8. I used white primer paint first, then a plum purple I wanted see at the end of the project. Remember to check your garage/house for any leftover paint before purchasing new paint.  It will save you a good bit of money.

img_9253

9. Peel the tape off before the paint completely drys. And notice what happens if you don’t do the clear sealer before painting – pic on right.

10. Now it’s time for another layer – an extremely lite green color (closer to the pear color I like).  Yes I sprayed over my hard work, and a little around the craftsmanship in the middle.  This makes for a great layered effect later on – you’ll see.

img_9502

11. I spray painted the hanging rod white first and then the lite pear green color.  I sprayed it the same color as the main piece. I wanted it to blend in.

img_9631

12. Using a foam brush and a darker pear green color, I painted particular areas that helps my piece stand out.

13. I carefully taped off lined areas and painted. First the clear sealer, then white primer, and last but not least the gorgeous plum purple color again. Once again I used a sponge brush.


14. It’s time to sand!  Have fun with it.  It doesn’t have to be perfect.  As you can see, there is a great layering effect with the paint colors coming through – even got a little wood showing 🙂

img_9654

15. I made sure to seal my paint work with a spray on sealer. This includes the rod.

img_9655

16. While the sealer dried, I painted some shower curtain hooks plum purple to match the tea cup rack piece.  I found these particular hooks at target. I love that they are flowers.

17. My loving husband helped screw in the rod as well as measure out and put in place the hanging wire.

18. Once it was completed, I quickly hung it and began hanging my collection of tea cups.

Thanks for reading!  I look forward to hearing how you re-purposed a broken piece and gave it new life.

Katie

Hydrangea Watercolor Video

Hope you enjoy watching my sped up version of a hydrangea watercolor painting.  Most of the supplies used in the video were found at Walmart or Joann’s.  When painting I look up pictures of the item I want to paint. It is very helpful to use it as a reference so I can stay focused on the topic at hand.

I’m looking forward to sharing more videos like the one above.  Thanks again for watching!

Katie


Caramel Salted Macarons

Caramel Salted Macarons

These macarons are a great treat with a good cup of coffee.  Grab your favorite book, snack and sip and you’ll be smiling all day.  I tried quite a few different caramel salted macaron recipes.  From homemade caramel to this ingenious idea to boil a can of sweetened condensed milk.  I’d have to say this is one of the easier macaron recipes I’ve tried and highly recommend it for your first attempt at macarons.  Make sure it matches your taste buds though; not everyone likes the sweet and salty caramel treat.  I made mine a bit sweeter by adding light brown sugar into the egg whites instead of regular granulated sugar. Bake, share and enjoy!

img_9664

Macaron Filling – Dulce de Leche

Ingredients:

1 can of sweetened condensed milk

Instructions:

  1. Bring a large pot of water to a rolling boil.  Make sure that you put enough water in the pot to completely cover the can.
  2. Remove the label from the can of sweetened condensed milk and carefully submerge it into the boiling water using a pair of tongs.  Make sure you place the can on its side, so it can roll around.
  3. Boil the can for 3 hours, making sure the can is covered with water at all times.  Add more boiled water if needed.
  4. Using a pair of tongs, take the can out of the pot and place it onto a heatproof surface to cool.  Make sure it has cooled to at least room temperature before opening the can, otherwise the dulce de leche will squirt out like a fountain.
  5. Once cooled, place dulce de leche in the refrigerator for an hour and a half (cooled dulce de leche can be stored, tightly covered in the refrigerator for up to 3 weeks) .
  6. When finished cooling, open the can, stir and scoop the cooled filling into a piping bag.  Pipe a small amount onto the macaron shells. Don’t overfill.
  7. Gently place matched shells together.


Macaron Batter

Ingredients:

¾ cup almond flour

1 cup of powdered/confectioners sugar

1 tsp of cream of tartar

2 egg whites

¼ cup light brown sugar

1 tsp coarse sea salt

img_9636

Instructions:

  1. Line parchment paper on two baking sheets.
  2. Have a piping bag prepared with a ½ inch tip and place it in upright in a glass cup.
  3. In a medium bowl, sift almond flour, powdered sugar and cream of tartar. Set aside until step 6
  4. In another medium bowl, beat egg whites at high speed using a wire whisk attachment
  5. When it begins to foam, add in brown sugar and continue to mix until peaks form (2 drops yellow food coloring – optional)
  6. Using a spatula, fold dry ingredients into egg whites.  Do this in TWO batches.
  7. Scoop batter into prepared piping bag.
  8. Pipe batter onto the parchment paper about 1 inch in diameter. Remember to tap the trays so air bubbles surface and macaron shells flatten.
  9. Preheat oven to 300
  10. Sprinkle a pinch of coarse sea salt on top of each macaron. Let the macarons sit for 20 to 30 mins until a “skin” forms.
  11. Bake one pan at a time for 12 to 15 mins. Depending on your oven
  12. Remove the pan from the oven and let the macaron shells cool completely.
  13. Once cooled, begin flipping and matching liked sized macaron shells.  This way they are ready for the filling.

Nila’s blog was extremely helpful!  Make sure to visit her blog for great recipes with good details. the tough cookie