Pumpkin Pie Scones

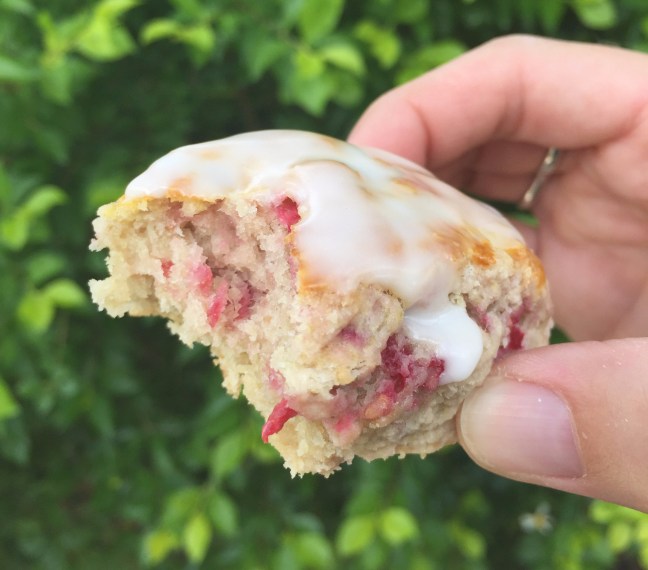
This scone recipe is based off of one of my all time favorite pumpkin pie recipes.  A pie recipe that does not require a crust.  It’s a simple yet delicious recipe.  The pumpkin flavor isn’t over powering and the tasty topping is a sweet treat with each bite.  Smelling them bake in the oven is just such a glorious aroma.  My mouth waits in anticipation each time I bake them.  To help distract you from watching the timer like I do, prep a cup of coffee or tea to enjoy with the scones.  They pair so well together.  Hope you enjoy.

I’d like to thank Betty Crocker Cookbook from the 1990’s for the delicious pie recipe.  It has been so much fun to modify and play around with this new pumpkin scone recipe.

Dry Ingredients

  • 2 cups flour (sifted)
  • 1 tbsp baking powder
  • ⅓ cup brown sugar
  • ¼ cup sugar
  • 1 tsp cinnamon
  • 1 tsp nutmeg
  • 1 tsp orange peel
  • 2 tsp pumpkin pie spice
  • ⅛ tsp salt

1 stick of frozen butter grated

Wet Ingredients

  • 1 tbsp vanilla extract
  • 1 egg
  • ½ cup pumpkin puree
  • 1 tbsp honey
  • ¼ cup heavy cream

Brown Sugar Topping

  • ¼ cup brown sugar
  • ¼ cup quick-cooking oats
  • 1 tbsp softened/melted butter


Instructions

  1. Preheat oven to 400 degrees
  2. Line a baking sheet with parchment paper.
  3. In a large bowl, sift the flour, brown sugar, baking powder, sugar, cinnamon, nutmeg, orange peel, pumpkin spice and salt.   
  4. Using a cheese grater (large holes) grate one stick of frozen butter and blend it into  the mixture until it resembles coarse crumbs. 
  5. In a small bowl, whisk together the egg, heavy cream, vanilla extract, honey and pumpkin puree.  
  6. Pour the wet ingredients over the dry ingredients and mix until just combined.
  7. Pat the dough out into a rectangular shape (like a flat log) that is about 1 inch thick.  Cut into 6 – 8 equal wedges (you can use a pizza cutter).  
  8. Arrange the wedges on your baking sheet or scone pan.    
  9. To make the topping, melt the butter carefully in a pan on the stove.  Add in the brown sugar and oats and mix well.
  10. With your fingers, press in a decent amount of the topping onto each scone.
  11. Bake for 14 to 16 minutes depending on your oven (I rotate mine after 10 to 12 minutes).
  12. Remove from the oven and allow to cool before enjoying.

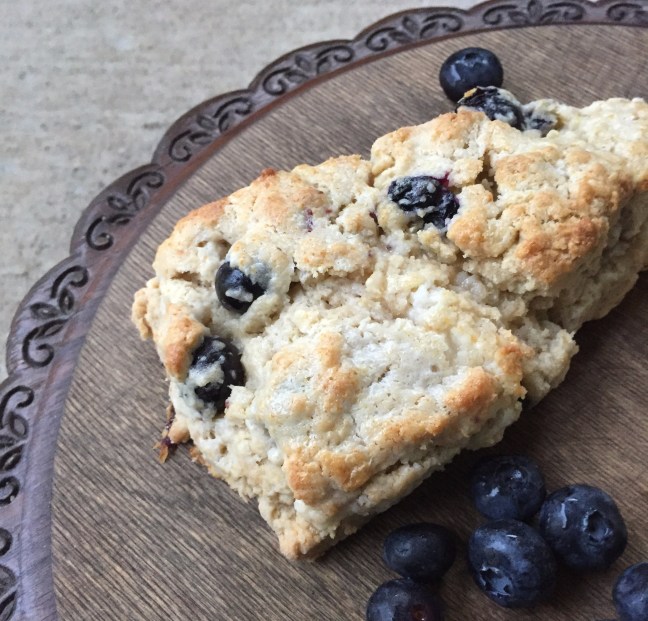
What a delicious remake of an old pumpkin pie recipe into a decadent scone. Autumn is such a wonderful season.  It’s hard not to think of autumn without pumpkin.  One of my favorite pumpkin pie recipes is crust-less.  That’s right, no crust.  Instead, you cover the pie with a brown sugar topping that holds it all together, while adding a bit more sweetness.  That’s what makes these pumpkin pie scones taste even better and adds some crunch. Don’t take my word for it, try it for yourself and enjoy.


Katie


Raspberry Scones with Lemon Glaze

This scone recipe is a bit more work than the rest of my scone recipes, but it’s so worth it!  It is a refreshing treat in this Florida heat.  The lemon glaze compliments the raspberry scone so well.  It’s that sweet yet sour flavor that is just a breath of fresh air.  So if you are looking for something to heighten the taste buds, this is it!

IMG_2705

Ingredients:

Scones

2 cups flour

⅓ cup packed brown sugar

1 tbsp baking powder

¼ tsp salt

1 stick of butter (frozen and grated)

1 egg

¼ sour cream

⅓ cup raspberry curd

½ cup fresh raspberries


Raspberry Curd   (Do this FIRST)

6 oz raspberries

3 egg yolks

¾ cup powdered sugar

1 tbsp lemon juice

1 tsp lemon zest

8 tbsp butter (room temp and cut into chunks)


Lemon Glaze

1 tsp Lemon extract

1 tsp Lemon Juice

1 to 2 cups Confectioners sugar


Instructions:

  1. Preheat oven to 400 degrees.
  2. Line a baking sheet with parchment paper.
  3. Prep table area with a sprinkle of flour and cutting blade.
  4. Puree raspberries in a food processor.
  5. Zest 3 to 4 lemons.  


  6. Using a double broiler (you can use a small pot with a glass bowl like I did). Add water to the pot and put on low heat.  
  7. Combine egg yolks, lemon juice, lemon zest and pureed raspberries into the glass bowl.  Make sure to cook over low heat and whisk for 8 minutes before adding the powdered sugar and continue to whisk for a few more minutes, until thickened.  IMG_1046
  8. Remove from heat and whisk in the butter.
  9. Strain the curd filling by pushing it through the strainer into a glass bowl.  This way you have less seeds in the curd.Raspberry Curd Filling
  10. Press plastic wrap directly onto the surface of the curd so there won’t be a skin later.  Then refrigerate until it is chilled.  Raspberry Curd Filling
  11. In a large bowl, sift the flour, brown sugar, baking powder, and salt.  
  12. Using a cheese grater (large holes) grate one stick of frozen butter and blend until the mixture resembles coarse crumbs.  
  13. In a small bowl, whisk together the egg, sour cream, and raspberry curd.  
  14. Pour the wet ingredients over the dry ingredients and mix until just combined.
  15. Sprinkle in the fresh raspberries.
  16. Carefully spread the raspberries throughout the ingredients. Don’t over blend it but make sure you don’t have large sections of it.
  17. Pat the dough out into a rectangular shape (like a flat log) that is about 1 inch thick.  Cut into 6 – 8 equal wedges (you can use a pizza cutter).
  18. Arrange the wedges on your baking sheet or scone pan.   
  19. Bake scones for 14 minutes and then rotate pan and bake an additional 2 to 3 mins until golden brown.
  20. While scones are baking, whip together lemon extract, lemon juice and confectioners sugar until thick but easily pour-able.
  21. Remove from the oven and allow to cool before pouring the lemon glaze over each scone.

The raspberry curd can be made ahead of time and placed in the refrigerator to make it a bit easier. Thank you for your interest in my recipe and I hope you enjoy!

Katie

Creamy Southern Style Potato Salad

A nice summer, southern tradition.  Just add a grilled burger and slice of watermelon and your set for a wonderful backyard feast.  Don’t forget the sweet tea too.  This creamy yet tangy potato salad is one of my favorite side dishes.  Usually I’m too lazy to make it and I just end up buying a small container from Publix; but there is just something about homemade potato salad that makes the taste and occasion seem so much better.

I’ve added in some tips and tricks that I’ve learned from other recipe bloggers and from experience that will save you some time.  It takes about 45 mins, maybe an hour to prep and make this delicious recipe.

Ingredients:

3 lbs potatoes diced

4 hard boiled eggs

½ cup chopped celery

1 tbsp chopped fresh parsley

Salt and pepper to taste

4 to 5 bacon strips (cooked and crumbled)

¼ cup diced chive onions


Dressing:

⅔ cup olive oil mayo

⅔ cup sour cream

1 tbsp apple cider vinegar

1 tbsp yellow mustard

½ tsp celery salt

1 tbsp pickle relish

1 tsp paprika

 
IMG_2353

Directions:

1. Fill a large pot half way with water and place on the stove. Then dice the potatoes and place them into the pot.

2. Turn the stove to high heat and boil the diced potatoes for 15 to 20 minutes.

3.  QUICK TIP 1 – Turn the oven on to 350 degrees. Place eggs into a muffin tin and bake for 28 to 30 minutes for boiled eggs.

IMG_0148

4. QUICK TIP 2 – Cook your bacon on a George Foreman Grill.  It cooks faster and is more crispy.  Also the grease is easier to clean up. When bacon is done, lay the strips on a paper towel on a plate to cool.

5. Chop the celery and chives and put to the side until later.

IMG_0147

6. Using a medium size bowl, mix the mayo, sour cream, apple cider vinegar and mustard.  Then add in relish, celery salt, and paprika. Mix until well blended.

7. Place a large glass dish with cold water (add ice) on the counter near the oven.  When the eggs are done baking, place them one at a time quickly into the ice water.  Let them sit for 10 minutes before peeling and dicing them.

8. QUICK TIP 3 – Strain the diced potatoes and let them cool in the refrigerator.  While they cool off, get a large serving dish that will be easy to mix all the finished ingredients.

9. Pour half the dressing into the serving dish.  Dump in half of the potatoes, all the diced eggs and celery.  Then pour in the rest of the dressing before dumping the rest of the potatoes.  Mix well.

10.  Once mixed well add salt and pepper to your liking.

11. Sprinkle bacon, parsley and chives over the top of the potato salad and it is ready to serve.


Hope you enjoy my take on a traditional potato salad dish.  It’s summer worthy.

Katie

Summer Fruit Salad

Such a great summer fruit salad!  Packed with juicy flavors to enjoy on a hot summer day.  And great colors for a fourth of July event.  Trust me you’ll have enough for a nice size party.  It’s so simple and yet so delicious.


Ingredients

Salad:

1 Seedless Watermelon (cut into small cubes)

2 pints of Strawberries (diced)

2 pints of Blueberries

1 pint of Blackberries

1 pint of Raspberries

-Optional- 1 pint of pitted cherries and small star cut outs of honey dew

Dressing:

½ cup of chopped fresh mint

1 cup honey

½ cup of lime juice (5 to 6 limes squeezed)

-Optional – instead of mint you can use poppy seeds


Directions

  1. Rinse and clean all fruit (you can rinse with water, vinegar and even baking soda to make sure it’s clean).
  2. Slice and dice the watermelon into small cubes (approximately ½ inch in size) and place in a large dish that can be sealed.
  3. Cut the leafy ends off of the strawberries and dice them into small bite size pieces.  Add them to the large dish.
  4. Sprinkle in blueberries, blackberries and raspberries.  Stir/mix until there is a nice mix of the colors of fruit.
  5. Slice and squeeze the limes into a small bowl.
  6. Either chop fresh mint or sprinkle poppy-seeds into the lime juice.
  7. Whisk in the honey and continue whisking until everything is blended nicely.
  8. Add the dressing last and mix well (I usually do it a few hours before serving so there is good flavor).


fruit salad 1

Thanks for viewing and hope you can enjoy this festive treat this July 4th!

Katie

Blueberry and Cream Cheese Scones

This recipe was an unexpected treat this weekend.  My husband was craving some of my scones but the only fresh fruit we had left was blueberries.  I also had the leftover cream cheese filling from my red velvet macaron recipe (those are delicious as well).  That’s when a great idea came to my mind… Blueberry Cream Cheese Scones.  Doesn’t it sound oh so delicious?  I always see these bread recipes with a cream cheese filling, so I thought why not do it in a scone.  So here is a simple yet perfectly tasteful scone recipe for you and your family to enjoy.

Ingredients:

Scones

2  and 1/4 cups flour

⅓ cup packed brown sugar

1 tbsp baking powder

½ tsp salt

1 stick of butter (frozen and grated)

1 egg

¼ cup heavy cream

¼ cup blueberry greek yogurt or sour cream

2 tsp vanilla extract

1/4 cup blueberry jam

½ cup fresh blueberries

3 tbsp cream cheese filling

Cream Cheese Filling

2 tbsp butter (room temp)

3 oz cream cheese (room temp)

¼ tsp vanilla extract

¾ cups powdered sugar


Instructions:

  1. Preheat oven to 400’
  2. Line a baking sheet with parchment paper.
  3. In a large bowl, sift the flour, brown sugar, baking powder, and salt.  If the brown sugar doesn’t go through the sifter you just dump it in just make sure its mixed well.
  4. Using a cheese grater (large holes) grate one stick of butter and blend until the mixture resembles coarse crumbs.
  5. In a small bowl, whisk together the egg, heavy cream, yogurt,  vanilla extract and blueberry jam.
  6. Pour the wet ingredients over the dry ingredients and mix until just combined.
  7. Gently fold in the fresh blueberries (it’s fine if some get smushed).
  8. Carefully add in the cream cheese filling. Don’t over blend it but make sure you don’t have large sections of it. IMG_1288
  9. Pat the dough out into a rectangular shape (like a flat log) that is about 1 inch thick.  Cut into 6 – 8 equal wedges (you can use a pizza cutter). 
  10. Arrange the wedges on your baking sheet or scone pan.  Using a basting brush, brush some heavy whipping cream over the tops of the scones. 
  11. Bake scones for 12 – 14 minutes or until light golden brown.
  12. Remove from the oven and allow to cool before enjoying.


Thanks for reading and hope you enjoyed!

Katie