Building Imaginations – Dress Up Furniture

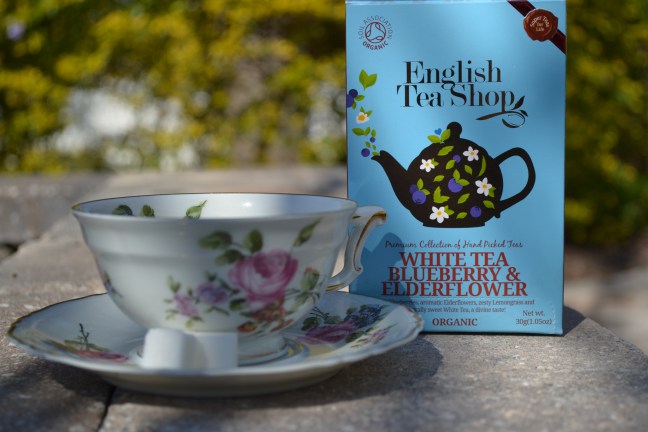
Imagination is so important.  I love giving my children the opportunities to try and/or practice being anything they want to be.  My oldest daughter loves dressing herself.  She rotates between ninja and princess most of the time.  The fun part about making special furniture pieces like this one, is the fact that I can enjoy it right along side my girls.  We have had our fun acting as ballerinas or super heroes flying through the house.  But the best one yet; is when we act like British ladies with adorable hats at a tea party.  That one is my favorite.

img_9562

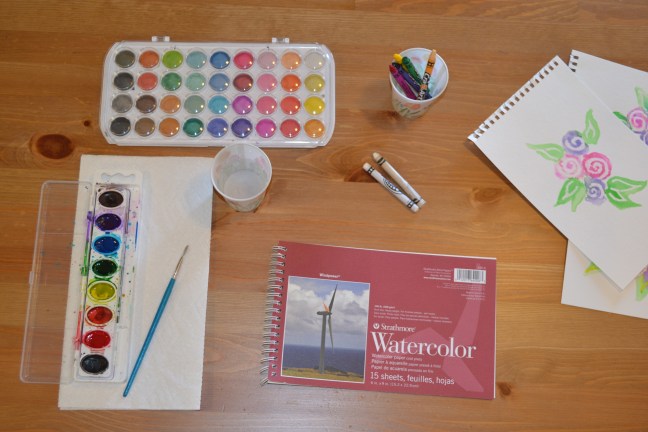
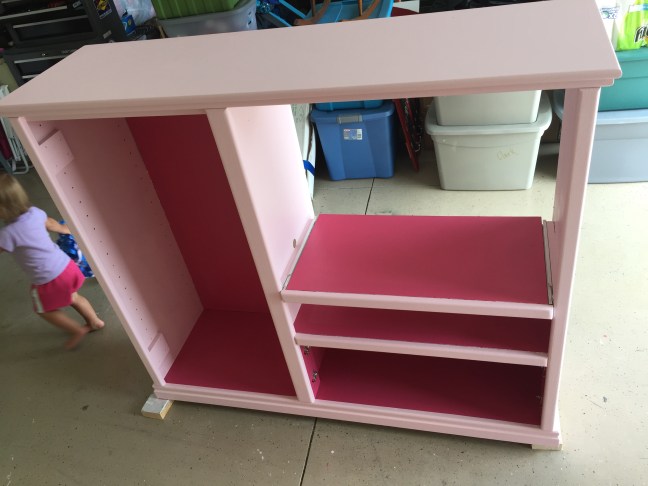
Don’t worry this didn’t cost an arm and an leg and didn’t take nearly as much time to complete as I thought it would.  Yes we had to sand it, prep it with white primer paint, and then tape it off to do the two tone color effect.  Knowing that this was going to be used by kids, I wasn’t too hard on myself to make it “perfect” (I even let the girls have a go with the painting too).  It will get scratched, dinged and even colored on :/.  Don’t fret, the best part is witnessing it being enjoyed.

You can find all sorts of furniture for inexpensive prices in all sorts of areas.  Mondays and Tuesdays are a great place to start at Goodwill.  I have found many items at garage sales and have even been able to find a couple items in the trash/free pile on front lawns.  This particular piece was found at Lighthouse Ministries (similar to Goodwill but Christian based values) for $25.

img_6454

The primer and light pink paint color I had to purchase from HomeDepot (about $15 – $20), but I already had leftover bright pink paint (always check what you have in your house before spending your money, you’ll be surprised by what you find).

img_6527

Once all the painting was done and dry I made sure to spray paint a sealer over it, twice (You can find spray paint sealer at Walmart for pretty cheap about $5).  Make sure you let it dry in a covered area outside.  It takes a few days for the spray paint smell to disappear.

spray-paint-sealer

My husband had the pleasure of cutting the $9 wooden round dowel and screwing in the two closet pole sockets ($5) to hold the pole in place (make sure it is kid safe – meaning they will try and hang on it, pull it and whatever else they can think of).

img_9566

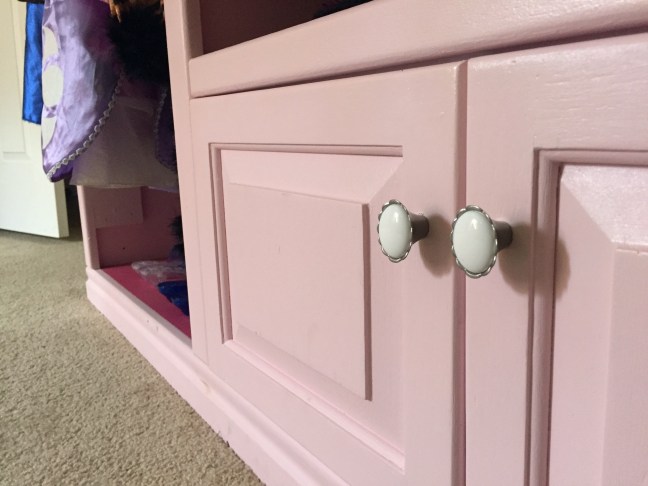
Last but not least, I had a few leftover cabinet knobs ($5) from another project. These two cute knobs were on clearance at JoAnns.  It just helped pull it altogether.

img_9567-1

In all, this piece cost us around $65.  Well worth it in my eyes, especially since some of the items purchased will be used on other products.  This is also an item I’d like to put in my future tearoom when I have enough room for a children’s tea area.  I look forward to the day when I can watch parents play pretend with their children at my tearoom 🙂


I am NOT receiving compensation for any of the materials suggested here.

Thanks for reading,

Katie

Please feel free to share any re-purposed items you’ve had the pleasure of completing. Also share any special tips or tricks for staying below your spending budget 😉

Sweet Chocolate and Strawberry Cheesecake Macarons

I’m not big on telling some whimsical story before we get to the good stuff – the recipe.  So here is, a tasty sweet treat that can be challenging to make if you don’t use the tips and tricks learned by others.  Enjoy!

Chocolate Macarons with Strawberry Cheesecake Filling

Chocolate Macaron Batter

(Makes about 13 sandwiched macarons)

Ingredients

1 cup powdered sugar

½ cup powdered almonds/almond meal

3 tbsp cocoa powder

2 large egg whites, at room temperature

Pinch of salt

1 tsp Cream of tartar

5 tbsp granulated sugar

Directions

  1. Preheat oven to 350 degrees
  2. Line two baking sheets with parchment paper (to make it easier you may want to use a sharpie on the back of the parchment paper to draw a one inch circle for each macaron shell) and have a pastry bag with a plain tip (about ½ inch) ready.
  3. Sift the powdered sugar, almond powder and cocoa powder (so there are no lumps) into a medium bowl and discard the larger lumps. Add cream of tartar and salt. Set to the side until step 5.
  4. Using a mixer, beat the egg whites (if eggs were not at room temp, place eggs in glass of warm water for 2 mins) until they begin to rise and hold their shape. While whipping, beat in the granulated sugar until very stiff and firm peaks form, about 2 minutes.
  5. Fold the dry ingredients, in two batches, into the beaten egg whites with a rubber spatula.  When the mixture is smooth and there are no streaks of egg white, stop folding and scrape the batter into the pastry bag (standing the bag in a tall glass helps).
  6. Pipe the batter on the parchment-lined baking sheets in 1 inch circles evenly spaced one inch apart (follow the circles that you drew earlier).
  7. Tap the baking sheet/pan a few times firmly on the countertop to flatten the macarons, and to remove the air bubbles.  Allow the macarons to sit for 20 to 30 minutes until a “skin” forms and they are no longer wet when lightly touched.
  8. Bake (one tray at a time) for 10 to 15 minutes.  Once done baking, let macaron shells cool completely.
  9. Once cooled, begin to flip and match like sized macaron shells so they are ready for the strawberry cheesecake filling.


Strawberry Cheesecake Macaron Filling

Ingredients

4 oz of strawberry cream cheese (room temp)

1/2 cup of heavy whipping cream

2 tbsp powdered sugar

½  tsp of vanilla extract (optional)

¼ cup strawberry jam (¼ cup sugar, 5 – 8 strawberries chopped, and 1 tbsp lemon juice)

Directions

  1. Place chopped strawberries in a pot on the stove.  Smash strawberries with a masher and put stove on medium heat.
  2. Add lemon juice, when it starts to simmer add sugar and stir until melted
  3. Remove jam from heat and pour 1/4 cup over the cream cheese in a glass dish. Add a few drops of food coloring.  After it is mixed well, place in the refrigerator until step 5 (save the rest of the strawberry jam for drizzling over the top of the macarons).
  4. In a medium bowl, whip the heavy cream, powdered sugar and vanilla extract until stiff peaks form.
  5. Using a rubber spatula, slowly fold in the strawberry jam cream cheese mixture.  
  6. Place blended filling in the fridge to chill for a few minutes, let cool completely before piping. While you wait for it to cool, have a pastry bag with a plain tip (about 1/2 inch – so pieces of strawberry will fit through the hole) ready.
  7. Pipe a small amount of filling (about a ½ inch mound) on the inside of the macaron shells and then gently sandwich them together.

Macaron Decoration Options:

  1. Dip ⅓ of the macaron into melted chocolate and then dip into crushed almonds.
  2. Drizzle the melted chocolate over macarons and then sprinkle crushed almonds on top and lastly, add a small drop of leftover strawberry jam on the tippy top.

Let macarons stand for one day before serving, to meld the flavors (don’t worry I ate mine immediately and they were delicious).  Serve macarons at room temperature, but store in the refrigerator.

Click on my YouTube video link for the visual recipe instructions:

Sweet Chocolate and Strawberry Cheesecake Macarons


Here are some items you can find on Amazon that were used during the making of this recipe.  I will receive compensation if you click and purchase any of the follow products below:

Pipping Bags Wilton Disposable 16-Inch Decorating Bags, 12 Pack

Icing Tips Wilton 418-1703 Round Star Icing Tip Set, Large

Sifter Cuisinart Set of 3 Fine Mesh Stainless Steel Strainers

Parchment Paper Reynolds Premium Parchment Paper (Non-Stick, 75 Square Foot Roll, 2 count)

Rubber Spatulas Farberware Set of 2 Scraper Spatulas, Red

Handheld Mixer Black And Decker Hand Mixer, MX400B

Cream of TartarMcCormick Cream of Tartar, 1.5 oz

Almond Powder Bob’s Red Mill Super Fine Almond Flour, 16 Ounce Packages (Pack of 4)

Cocoa Powder Nestle Toll House Cocoa, 8 Ounce


This link was very helpful when learning tips and tricks to making macarons – Please check out Beth’s YouTube Video  https://youtu.be/xJ636Y8N6E8

Simple Valentine Watercolor Painting

Using inexpensive watercolors, crayons and watercolor paper you can make a beautiful flower bouquet painting.  My 3 year old enjoyed painting over the wax crayons and seeing her painting come to life. Click on the link to watch my you-tube video  Simple Valentine Watercolor Painting

dsc_1335-1

I am no professional painter, but I do enjoy painting and crafting whenever I get a chance. I have learned tips and tricks through personal practice, art classes, and glimpses of other you-tubers.  I’ve only gone over a few tips/tricks in the video for this simple watercolor painting craft.

IMG_9405.JPG

Hope you enjoy and I’ll make sure my videos improve with time.

The items stated below are the items used in the video (I will receive compensation if you click and purchase any of these items from Amazon).

Watercolor Loew Cornell 1021095 Simply Art Watercolor Cakes

Watercolor Paper Strathmore 298103 Cold Press 140-Pound 12-Sheet Strathmore Watercolor Paper Pad, 5.5 by 8.5-Inch

Crayola Watercolor Prang Washable Watercolor Set, 8 Classic Colors with Brush, Assorted Colors (80525)

Watercolor Paintbrushes Watercolor Brushes – Round Pointed Tip Paint Brushes for Fine Painting and Detailing – Acrylic Watercolor Oil Ink and Facepaint – Set of 10 Quality Anti-Shedding Nylon Brushes with Secure Ferrules

Crayons Crayola Crayons 24 Count – 2 Packs 52-0024-2 5200242, crayon great school

White Tea Blueberry & Elderflower

I received a surprise package a few months ago and inside I was given this delicious tea. Now, I get no compensation for this review, just the joy of sharing something tasty with others.

This has been my go to tea lately.  It goes well with my recent scone recipe (hint, hint).  It is made with delicious blueberries, sweet Elderflowers, lemongrass and naturally sweet white tea.  What makes this tea even better is that it is organic.  English Tea Shop recommends letting the tea bag sit in hot water (176 degrees F) for 2 to 3 minutes to allow the tea to infuse.  I added a sugar cube or two to give it a bit more sweetness.  I’ve also added cream/milk but it is not necessary for this particular tea.

DSC_1352.JPG

I’ve been doing a lot of research on how tea is made and I am looking forward to trying a few recipes myself.  I was blessed with a dehydrator that will be getting plenty of use drying fruit, flowers, herbs and leaves.  My goal is to create a new and unique job for people with disabilities related to making tea.  I’m very excited about the new things I’m learning related to tea and sharing them with my readers.

If you’d like to purchase this tea you may click the link provided English Tea Shop Organic White Tea Blueberry & Elderflower Super Teas (I will be compensated for your purchase through amazon).  I have seen this particular tea at Walmart and Target on rare occasions.

I look forward to hearing about your taste tests, as well as any feedback to making your own tea (steps, helpful hints, etc).


Thanks,

Katie

Mouthwatering Peaches and Cream Scones

Delicious peaches and cream scones with a sprinkle of chopped pecans.

When you have dreams and aspirations of owning your own tearoom you just can’t help but dive into so many scone recipes.  There were so many to choose from so why not start with the first word in my business name; Peach.  

I have baked many scones in the past few months and I have come to the conclusion that most scone recipes seem a bit dry and not as flavorful as I would like. After searching and modifying so many times I concocted the perfect mixture. So get ready for your mouth to water and your taste buds to tingle; this is one delicious scone recipe.

Ingredients:

Scones

2 and 1/4 cups flour (sifted)

⅓ cup packed brown sugar

1 tbsp baking powder

½ tsp salt

1 stick of butter (frozen and grated)

1 egg

¼ cup heavy cream

¼ cup peach greek yogurt

2 tsp vanilla extract

½ cup diced/mashed peaches

½ tsp cinnamon

¼ tsp nutmeg

Glaze/Topping

½ cup powdered sugar

2 tbsp vanilla extract

1-3 tbsp heavy whipping cream
Optional: ⅓ cup chopped pecans

Instructions:

  1. Preheat oven to 400 degrees
  2. Line a baking sheet with parchment paper or spray tray with nonstick cooking spray.

img_9269

3. In a large bowl, whisk together the flour, brown sugar, baking powder, cinnamon, nutmeg and salt.  I recommend sifting the flour.

img_9273

4. Using a cheese grater (large holes) grate one stick of butter and blend until the mixture resembles coarse crumbs.

5. In a small bowl, whisk together the egg, heavy cream, yogurt and vanilla extract.

6. Pour the wet ingredients over the dry ingredients and mix until just combined. 

7. Gently fold in the diced peaches (pat with a dry paper towel first).

8. Pat the dough out into a rectangular shape (like a flat log) that is about 1 inch thick.  Cut into 6 – 8 equal wedges (use a pizza cutter)

9. Arrange the wedges on your baking sheet or scone pan.  Using a basting brush, brush some heavy whipping cream over the tops of the scones.

10. Bake scones for 12 – 14 minutes or until light golden brown.

11.Remove from the oven and allow to cool while you mix the glaze.

12. To make the glaze, add the powdered sugar and vanilla to a small bowl.

13. Add the heavy whipping cream slowly (one tbsp at a time) until the mixture is easily pour-able but not runny.  Drizzle the glaze over the scones.

14. Crush a handful of pecans and sprinkle over the scones. (I let my kids take turns using the chopper for this step – they love it).

I strongly recommend using a cheese grater to cut the frozen butter.  It is so much easier. Here is the one I used.  I do get compensation if you click on this link and order. Cuisinart CTG-00-BG Boxed Grater